Managing Apiaries and Hives
What you'll learn in this chapter
In this section, you'll learn how to set up and manage your apiaries and hives in MyBroodMinder.
You'll be guided through creating new apiaries, assigning hives, editing locations, and even tracking hive movements between apiaries — with all changes reflected in your data.
You'll also discover how to efficiently manage larger operations using the Configure page for bulk editing, archiving, and device tracking.
One of the very first steps you’ll likely take is to create an apiary and attach some hives to it. This is a key part of building your hive monitoring setup.
You can do this using either the Bees App or MyBroodMinder like in the screenshot below, simply click the New button on the left sidebar:

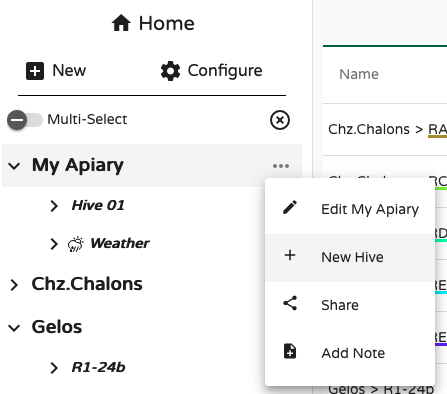
Creating a New Apiary
When adding a new apiary, you’ll be asked to:
- Give it a name
- Set a location with a postal/ZIP code
- Optionally pick a graph color for this apiary (used in weather charts)

ZIP code is used by the weather service
Choose your ZIP/postal code carefully — it determines the local weather data displayed for your apiary.
For better accuracy, you can adjust the apiary location once it has been created. Click the three-dot menu ... > Edit Apiary > Edit Location, then pick the new place on the map.

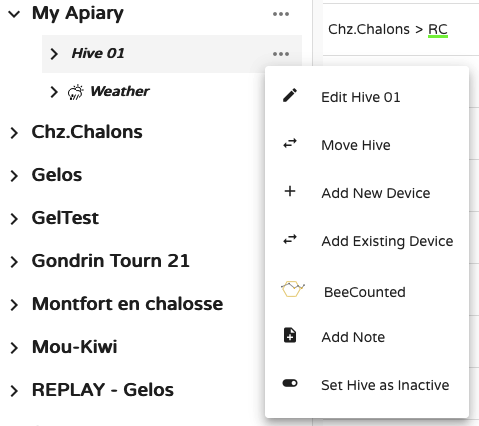
Creating a New Hive
To add a hive, simply click the ... menu next to an apiary. This automatically links the hive to that location. Name the hive and assign it a color for graph displays. You can edit those settings at any time.
Moving Hives Between Apiaries
Hives are always attached to an apiary, but they can be moved freely. This feature allows you to track hive migrations over time.
To move a hive select Move Hive in the drop down:
These movements will be materialized in the charts by pink dashed vertical lines — showing the transition between apiaries (e.g., from A to B to C in the example below):
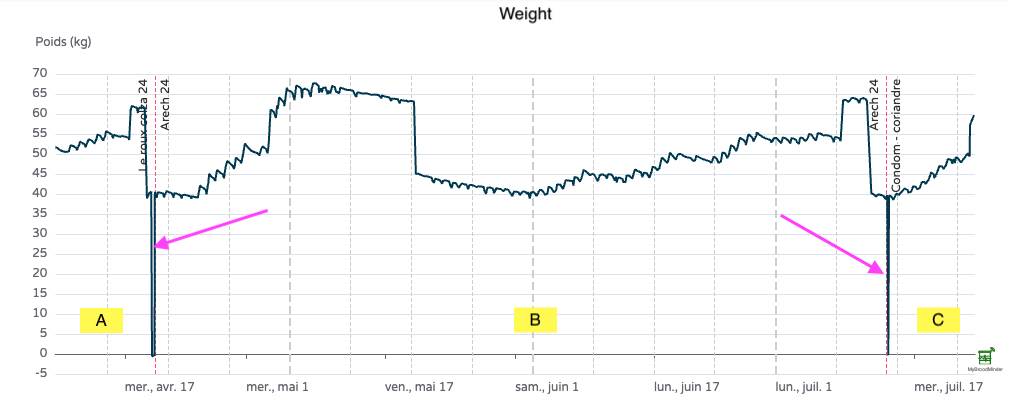
In this example, hive scales were removed during the move, which is reflected by the 0 kg/lb values.
To display the weather history the hive experienced throughout its life, you’ll need to combine weather data from each apiary (A, B, and C).
Managing in Batches
So far, we’ve used the sidebar tools in MyBroodMinder. For more efficient bulk management, head over to the Configure page.
Click Configure in the left menu to view and manage every detail in MyBbroodMinder. For now we will focus on Apiaries and Hives
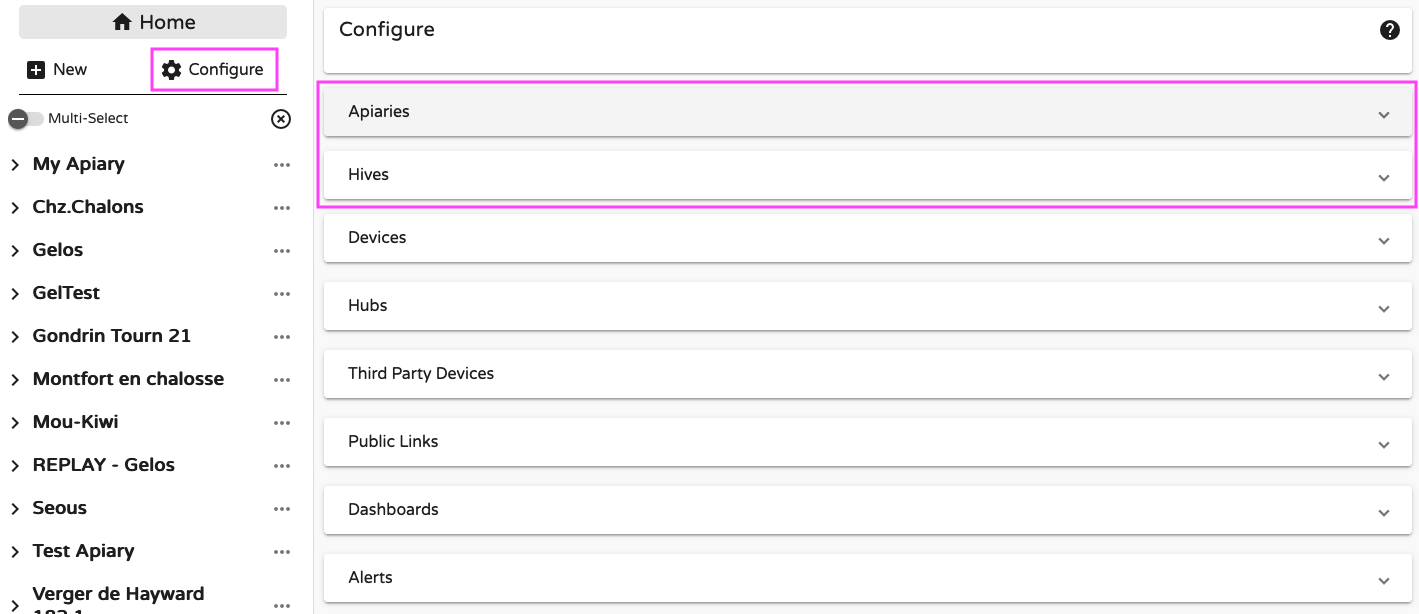
Configuring Apiaries
Under Configure > Apiaries, you can:
- Edit apiary names and locations
- Add a local weather source (e.g., a BroodMinder device broadcasting temperature/humidity) to complete the default online weather service
- Archive or delete apiaries
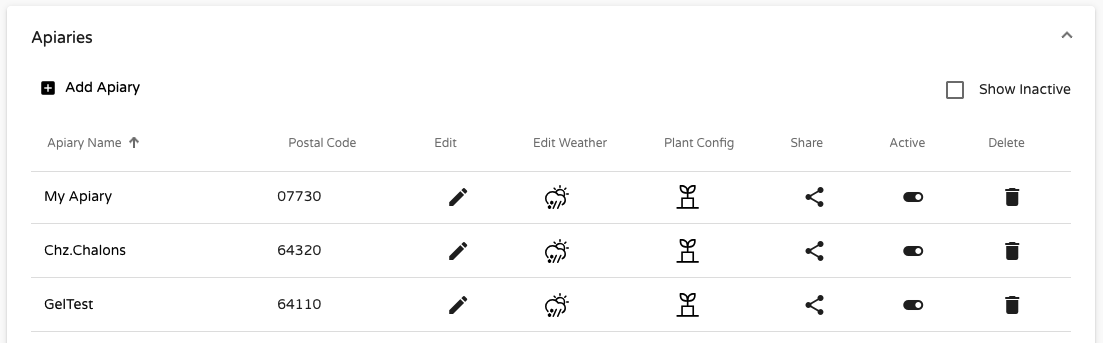
Inactive apiaries
You cannot delete an apiary if it still contains hives (active or inactive) — you’ll need to delete those first.
However, the recommended approach is to deactivate the apiary. It will disappear from the sidebar but remain in the system for later recovery.
Use the Show inactive checkbox in Configure > Apiaries to reveal them.
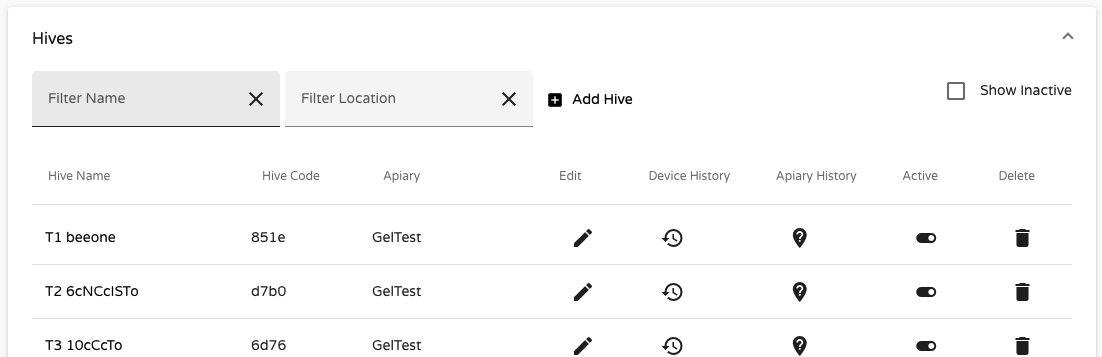
Configuring Hives
Under Configure > Hives, you can:
- Rename hives
- Adjust device associations over time
- Move hives between apiaries
- Set hives as inactive (data retained)
- Delete hives (data permanently removed)
- Track the device history of each hive
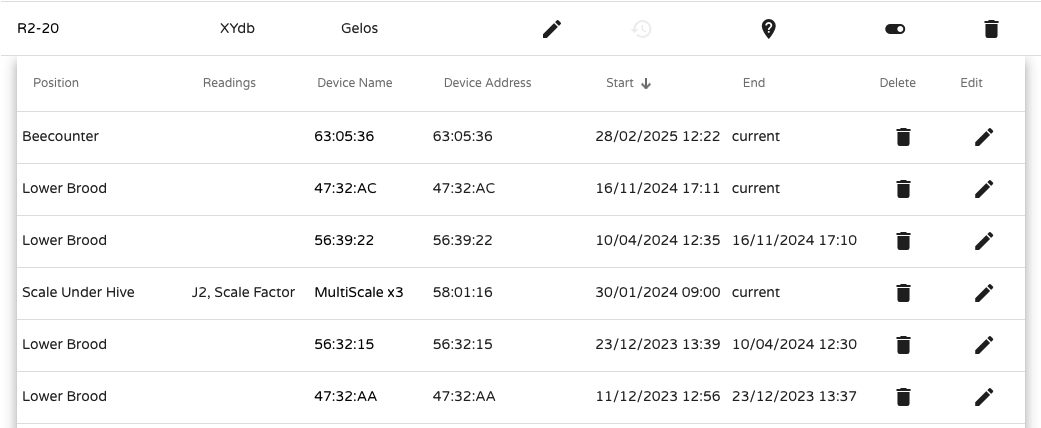
Here’s an example of hive R2-20, which has used various devices over time. It currently has a bee counter, an internal sensor, and a scale, and previously used another internal sensor from April 10 to Nov. 16, 2024.
Tracking devices, hives, and apiary changes is one of MyBroodMinder’s most powerful capabilities.
With devices now in the picture, let’s move to the next chapter: Managing Devices.