W3 and DIY circuit board assembly
What follow will explain you how to assemble the hive scale boards wheter if they are for the BroodMinder-W3 model or for the BroodMinder-DIY
Important
If you purchased a W3 Unassembled-Calibrated scale, all your electronics work is already done and you can jump straight to the next section : Scale Assembly
Get started with the circuit board.
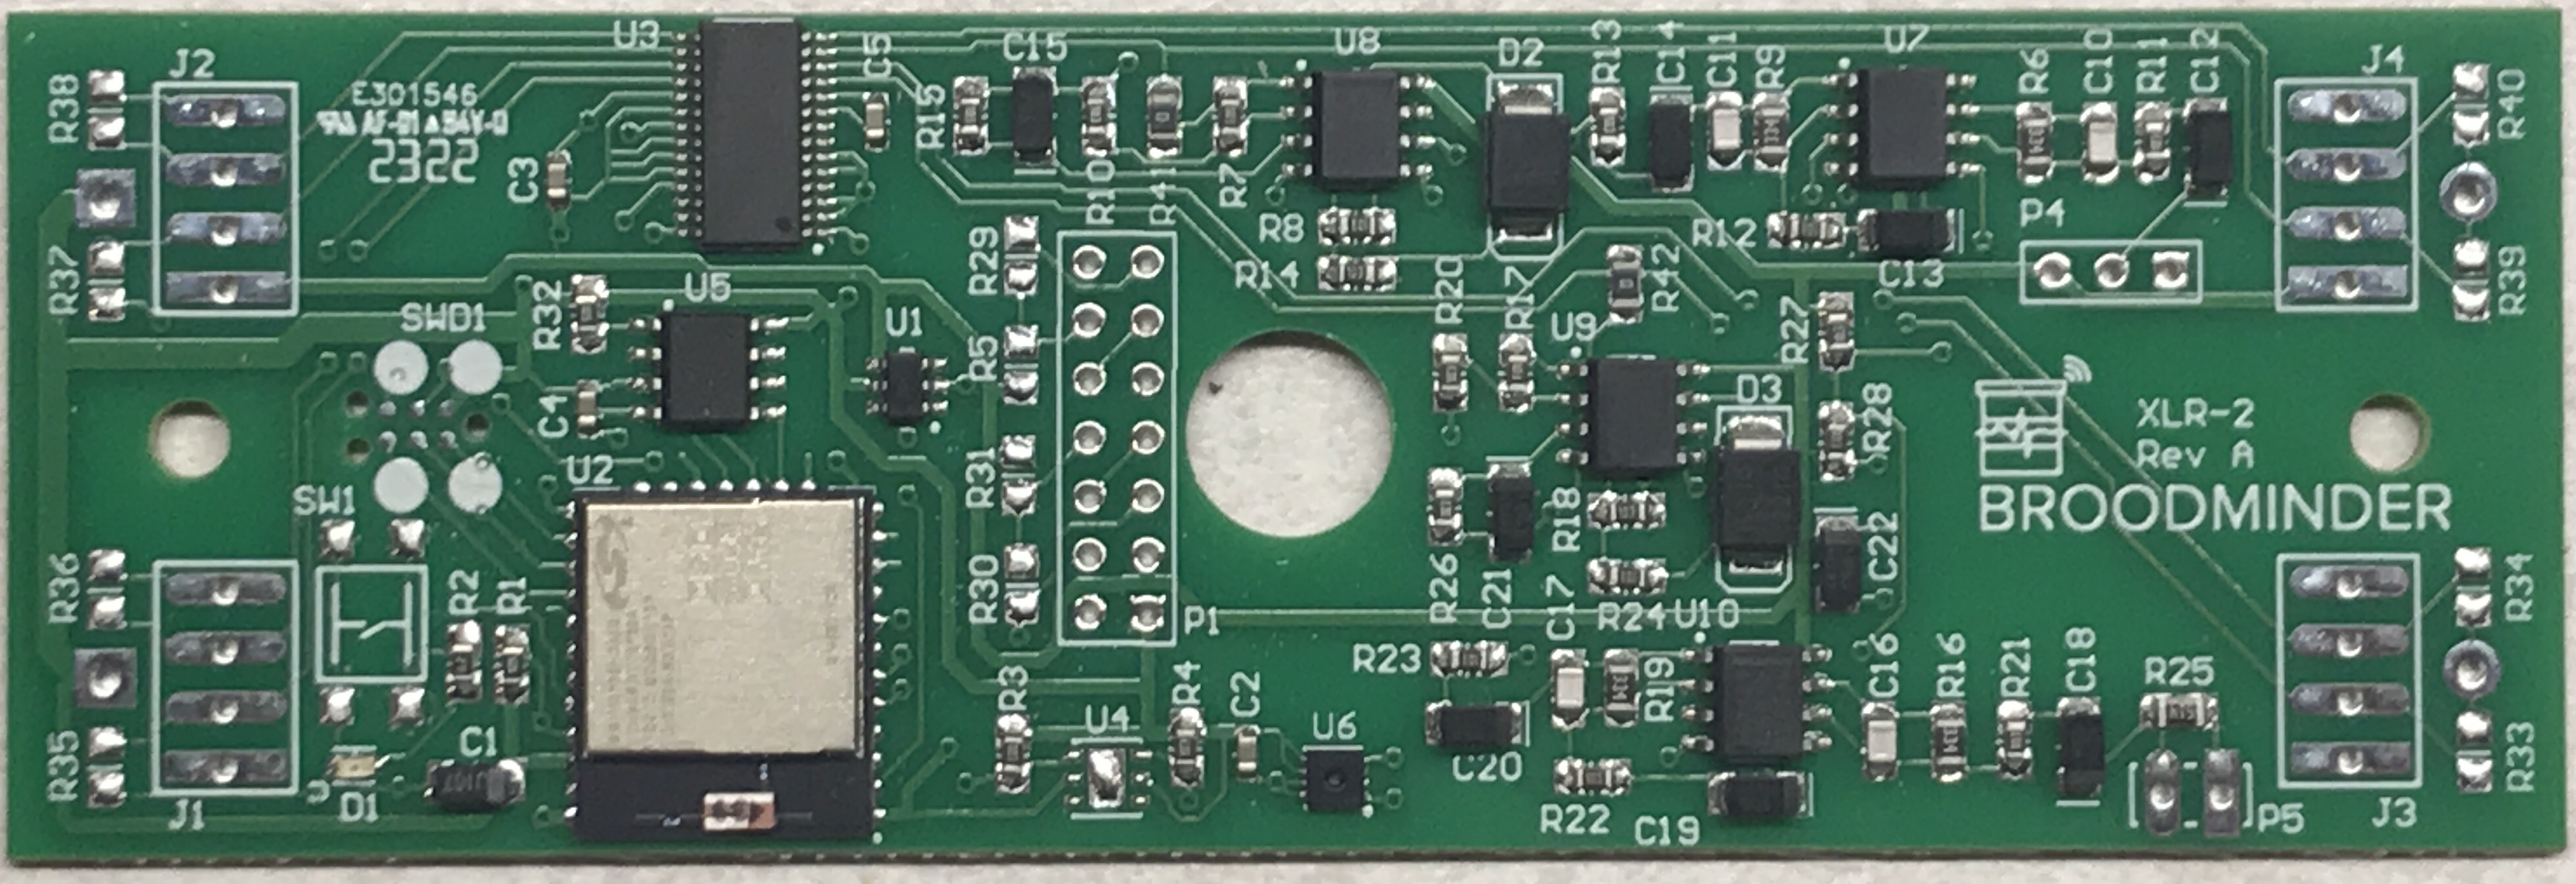
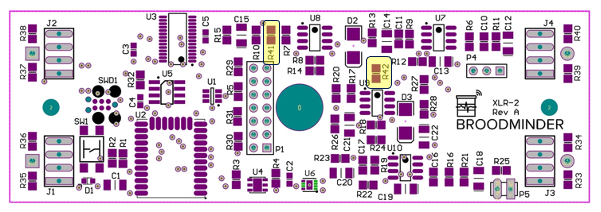
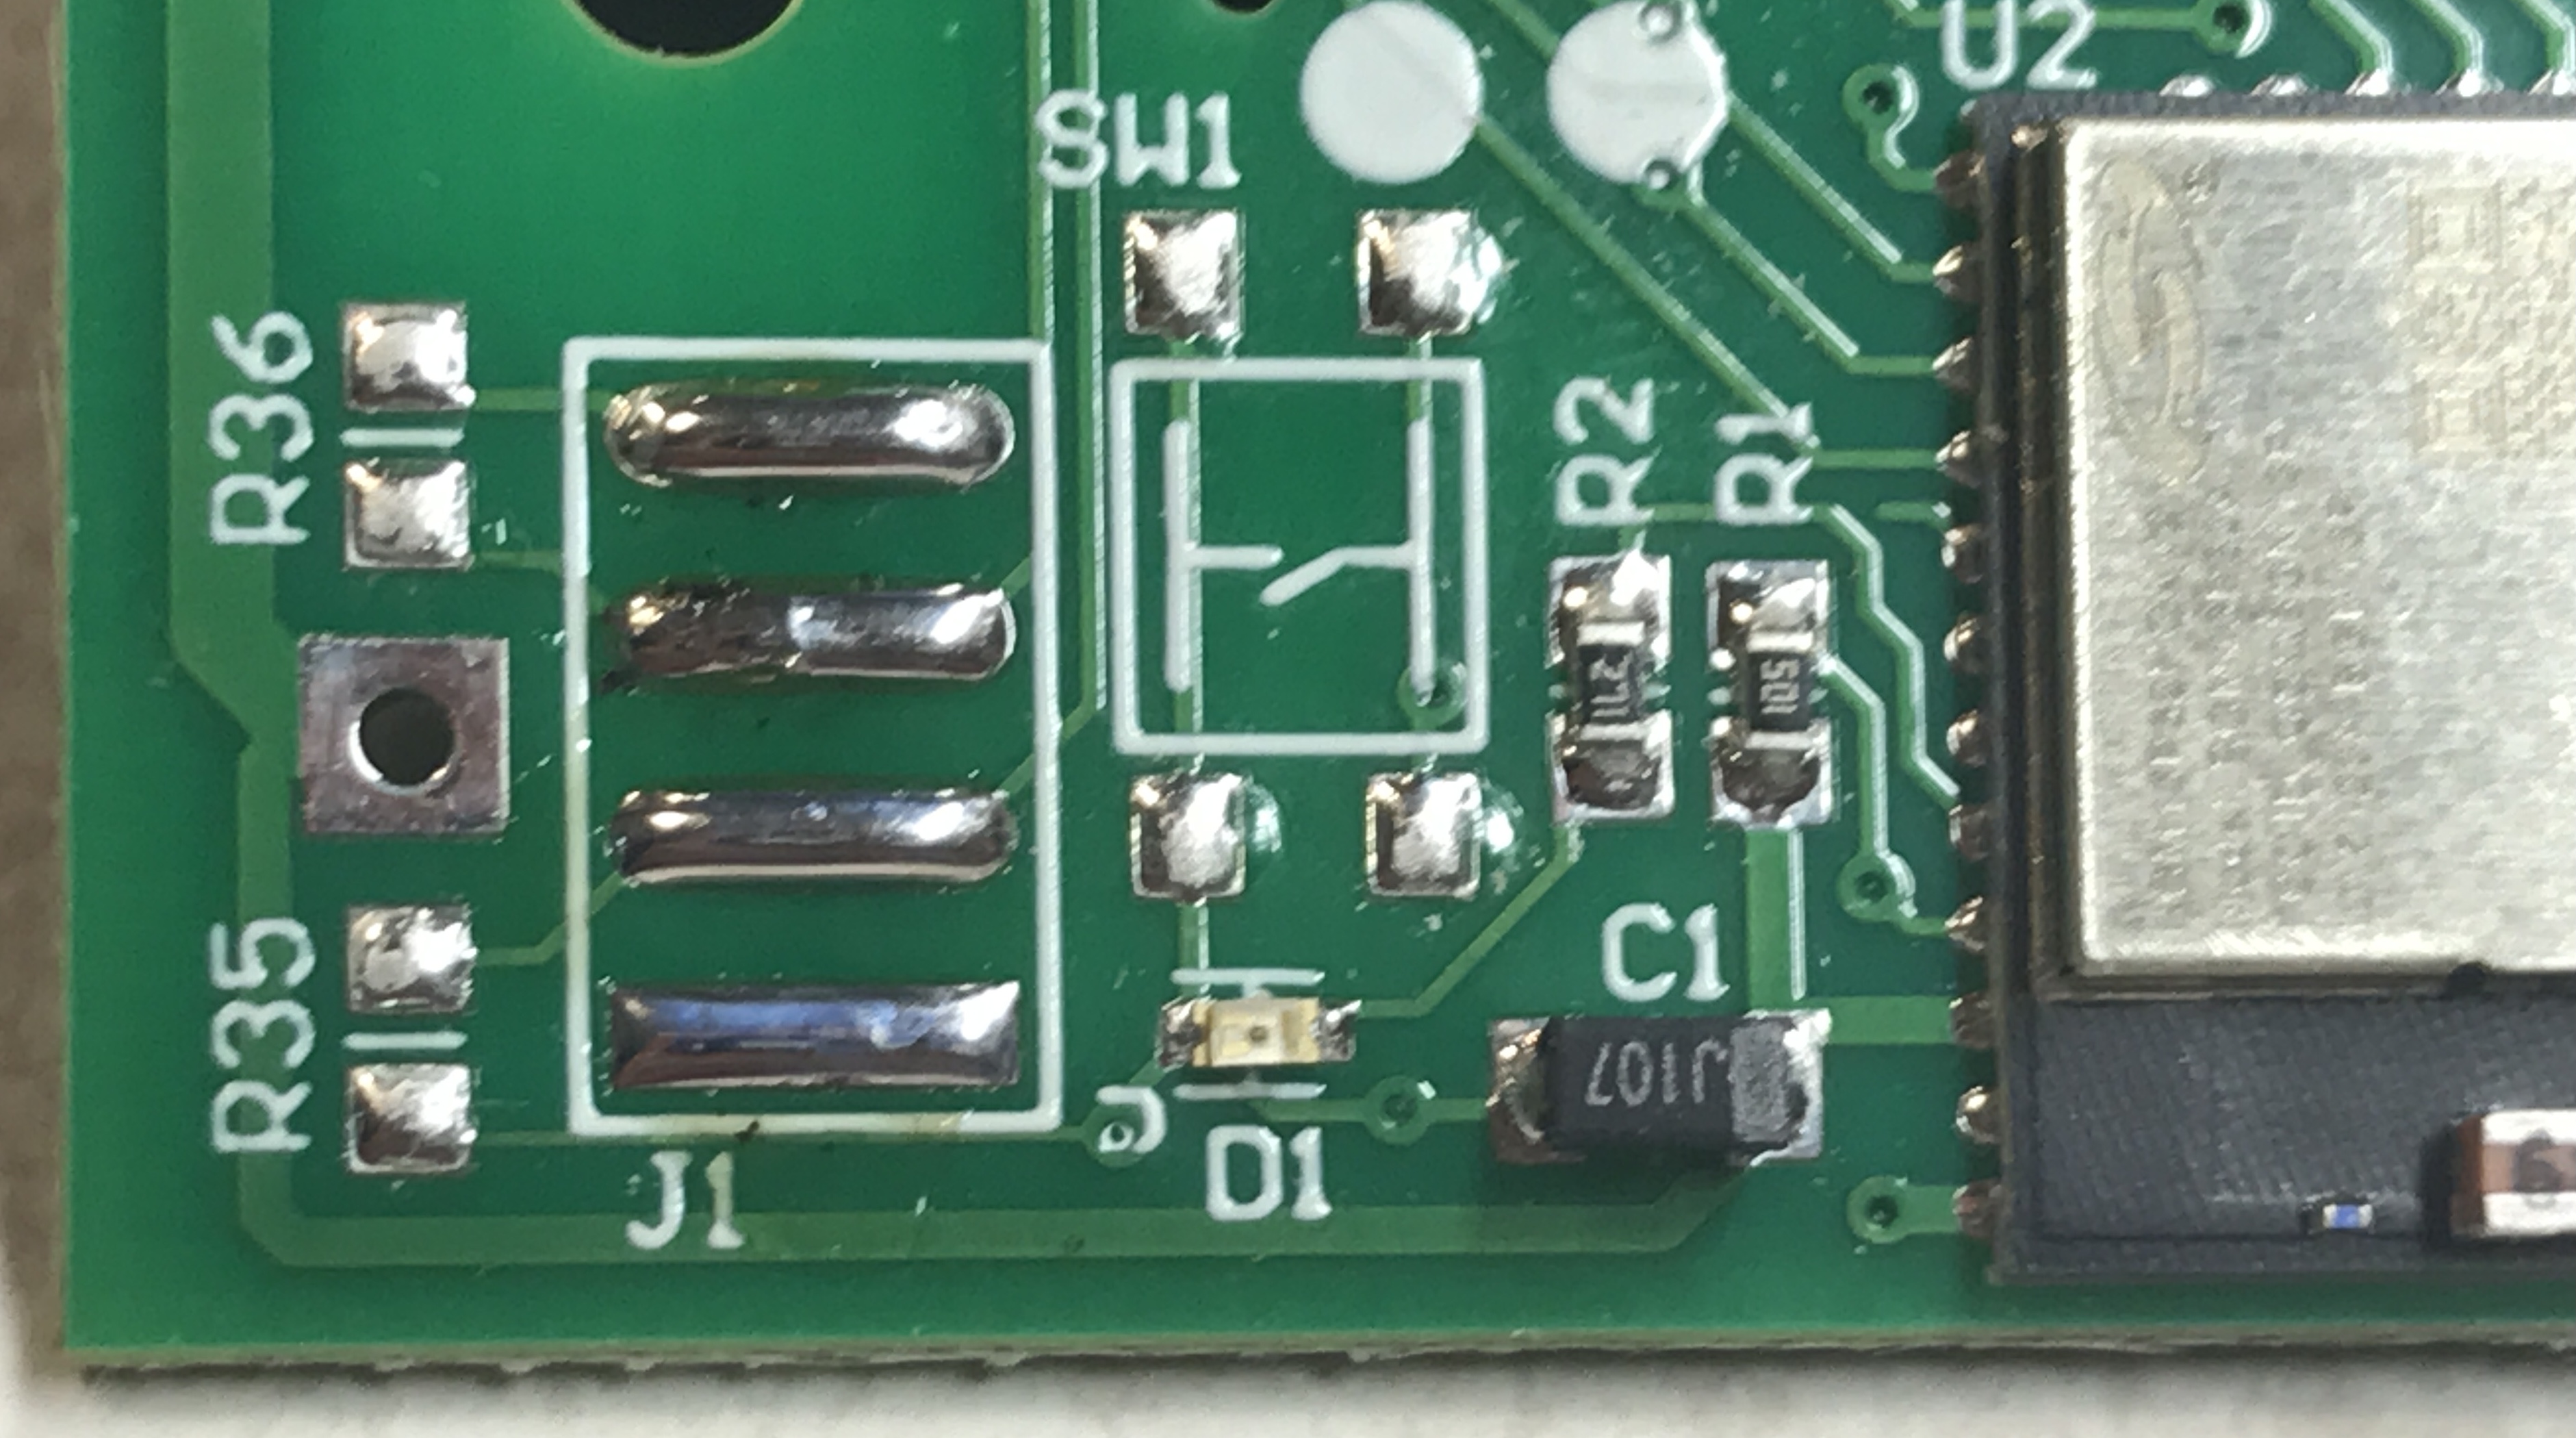
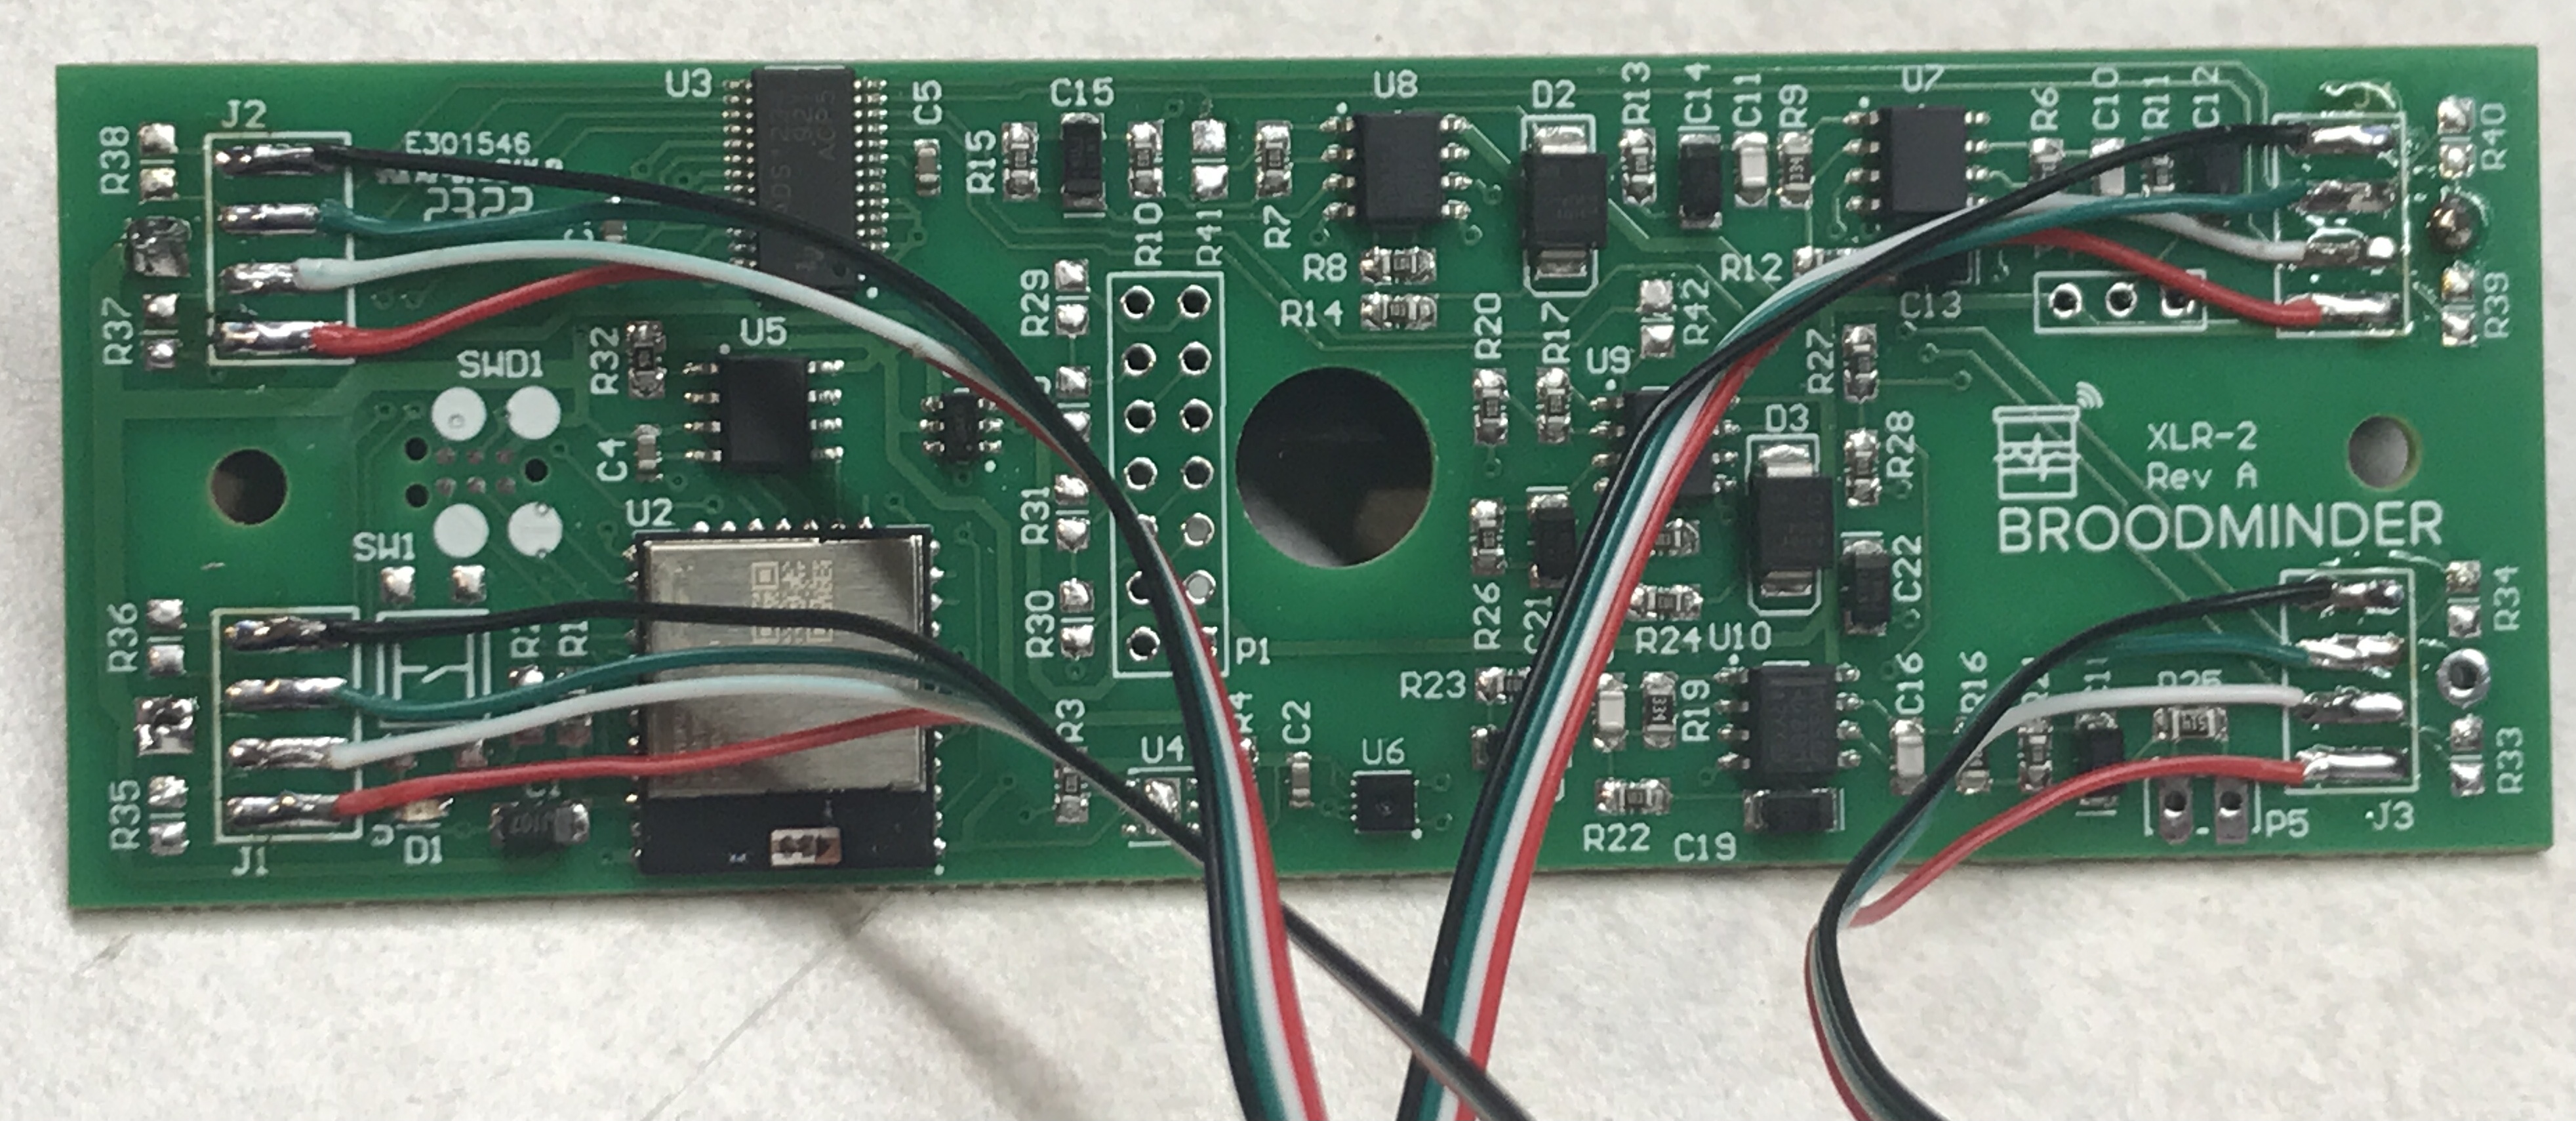
The XLR2 is a multi purpose board and the first thing you'll have to do is remove two resistors with your soldering iron : R41 and R42 as depicted in the scheme below
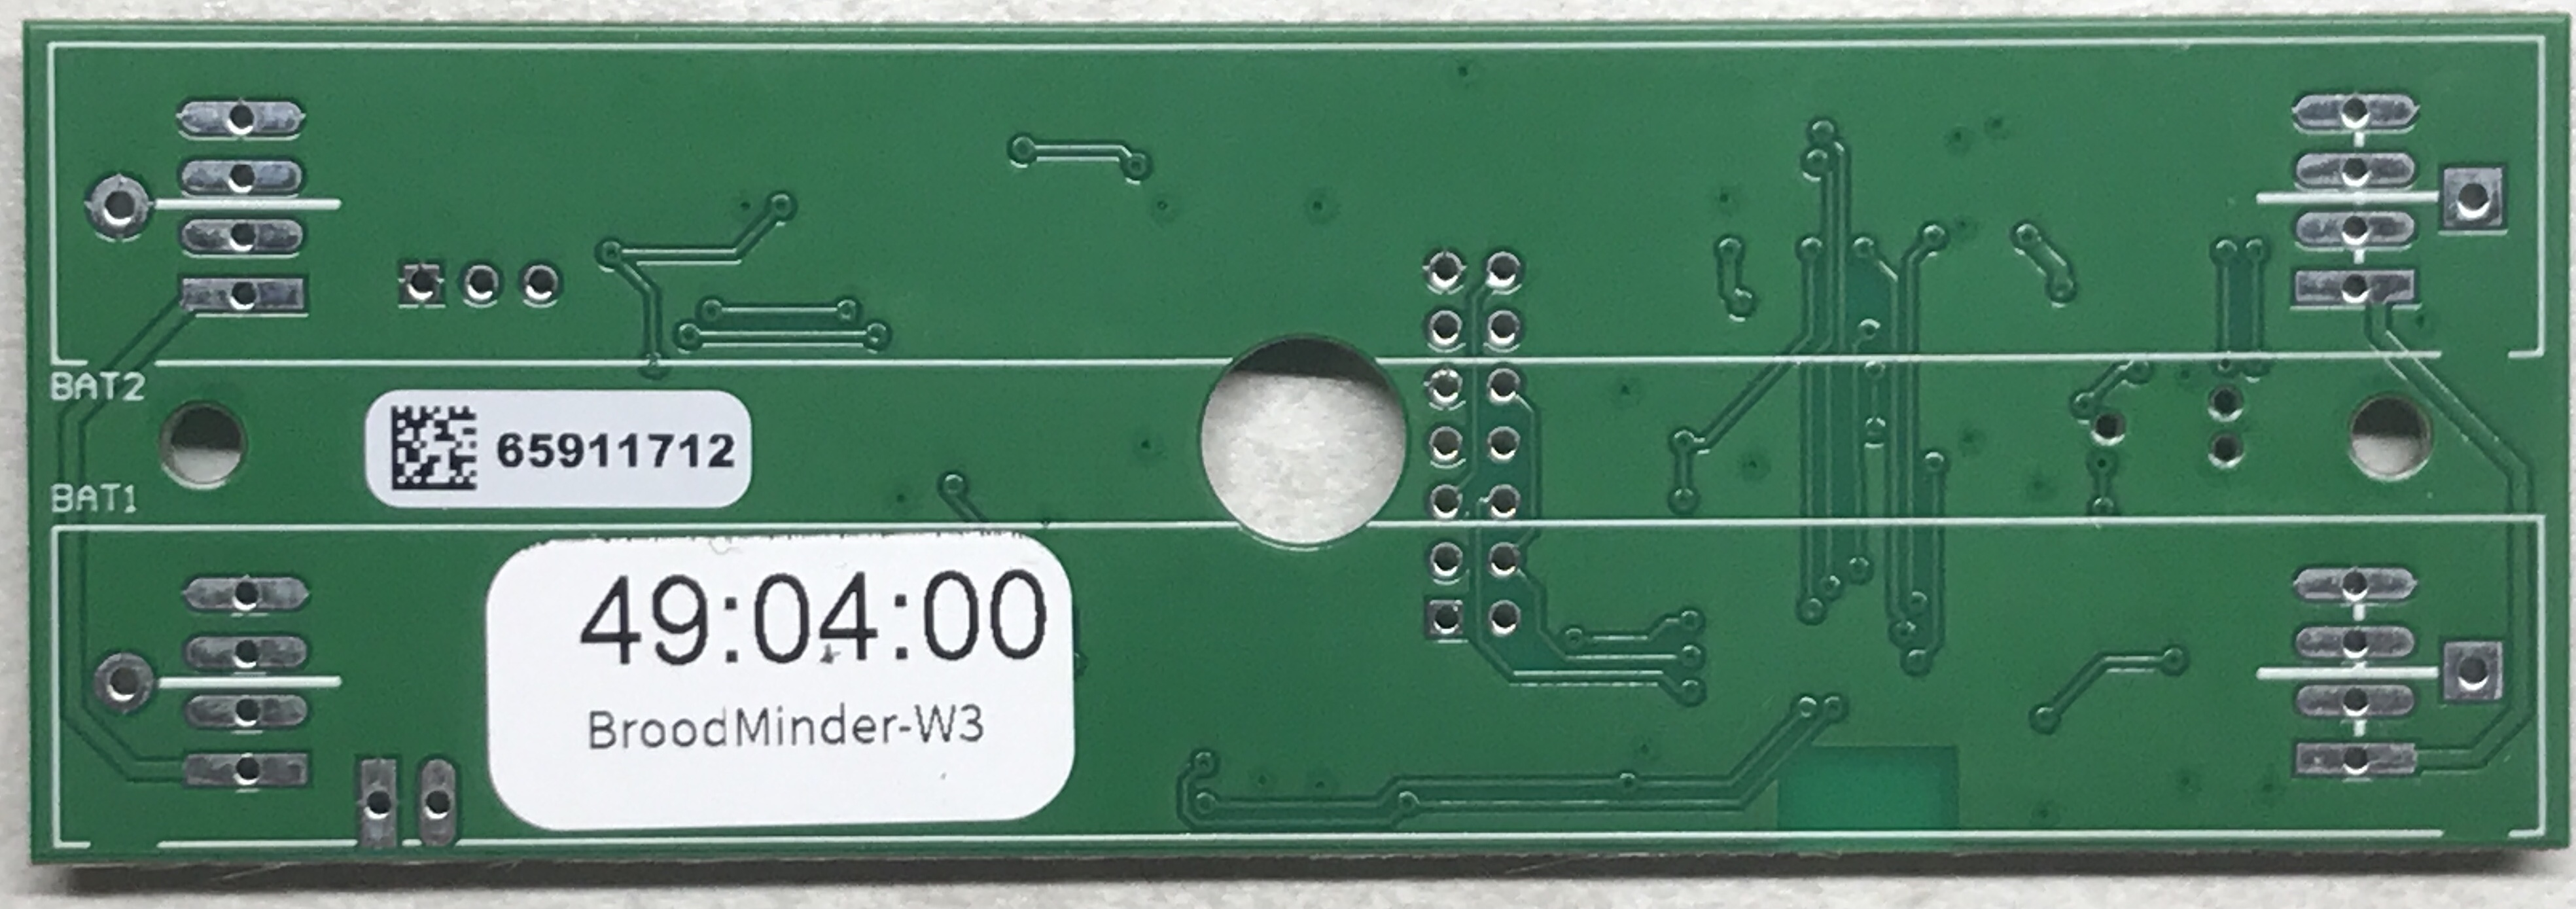
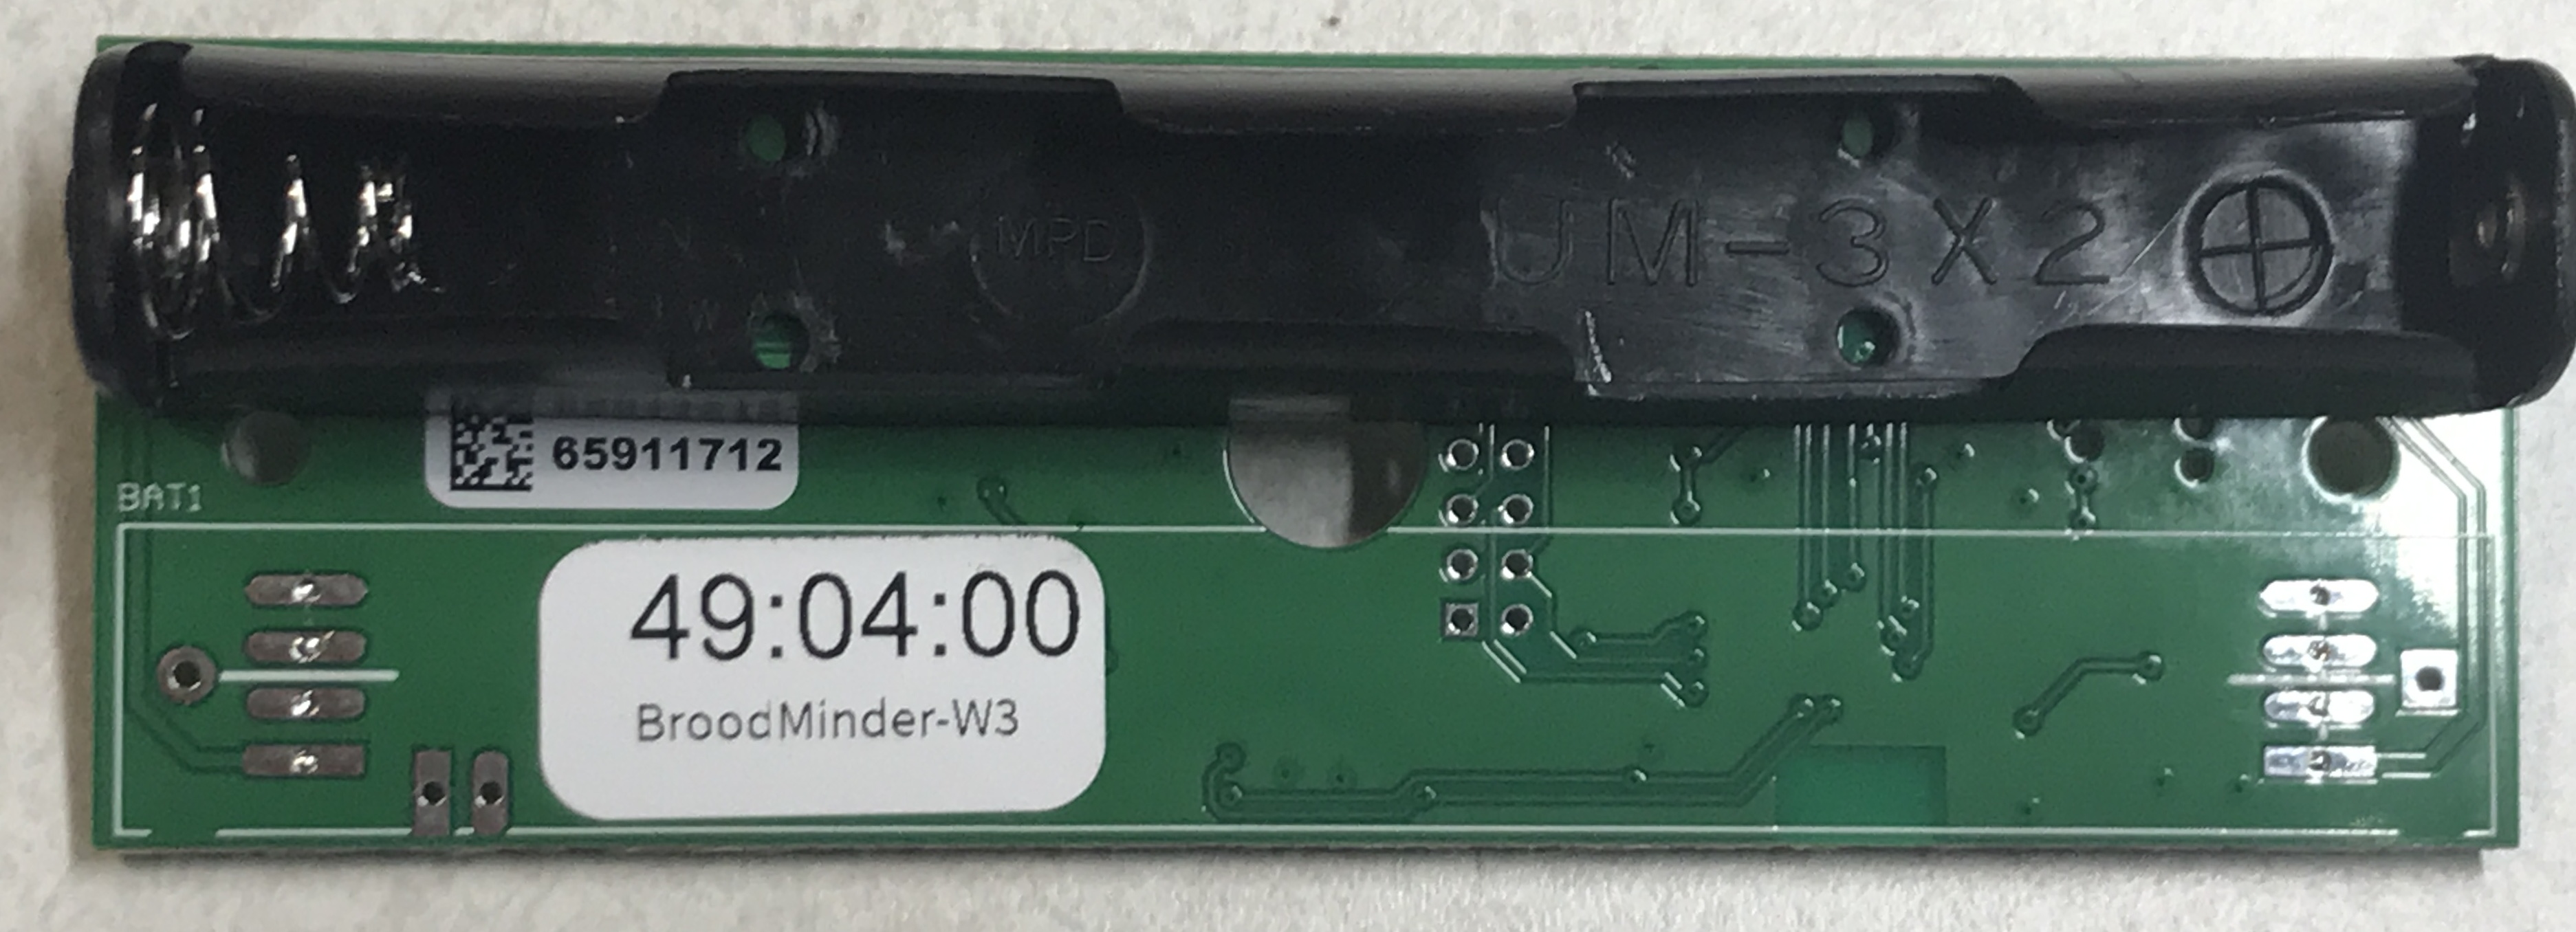
Now apply labels as shown (in the BAT1 slot)
Program the board
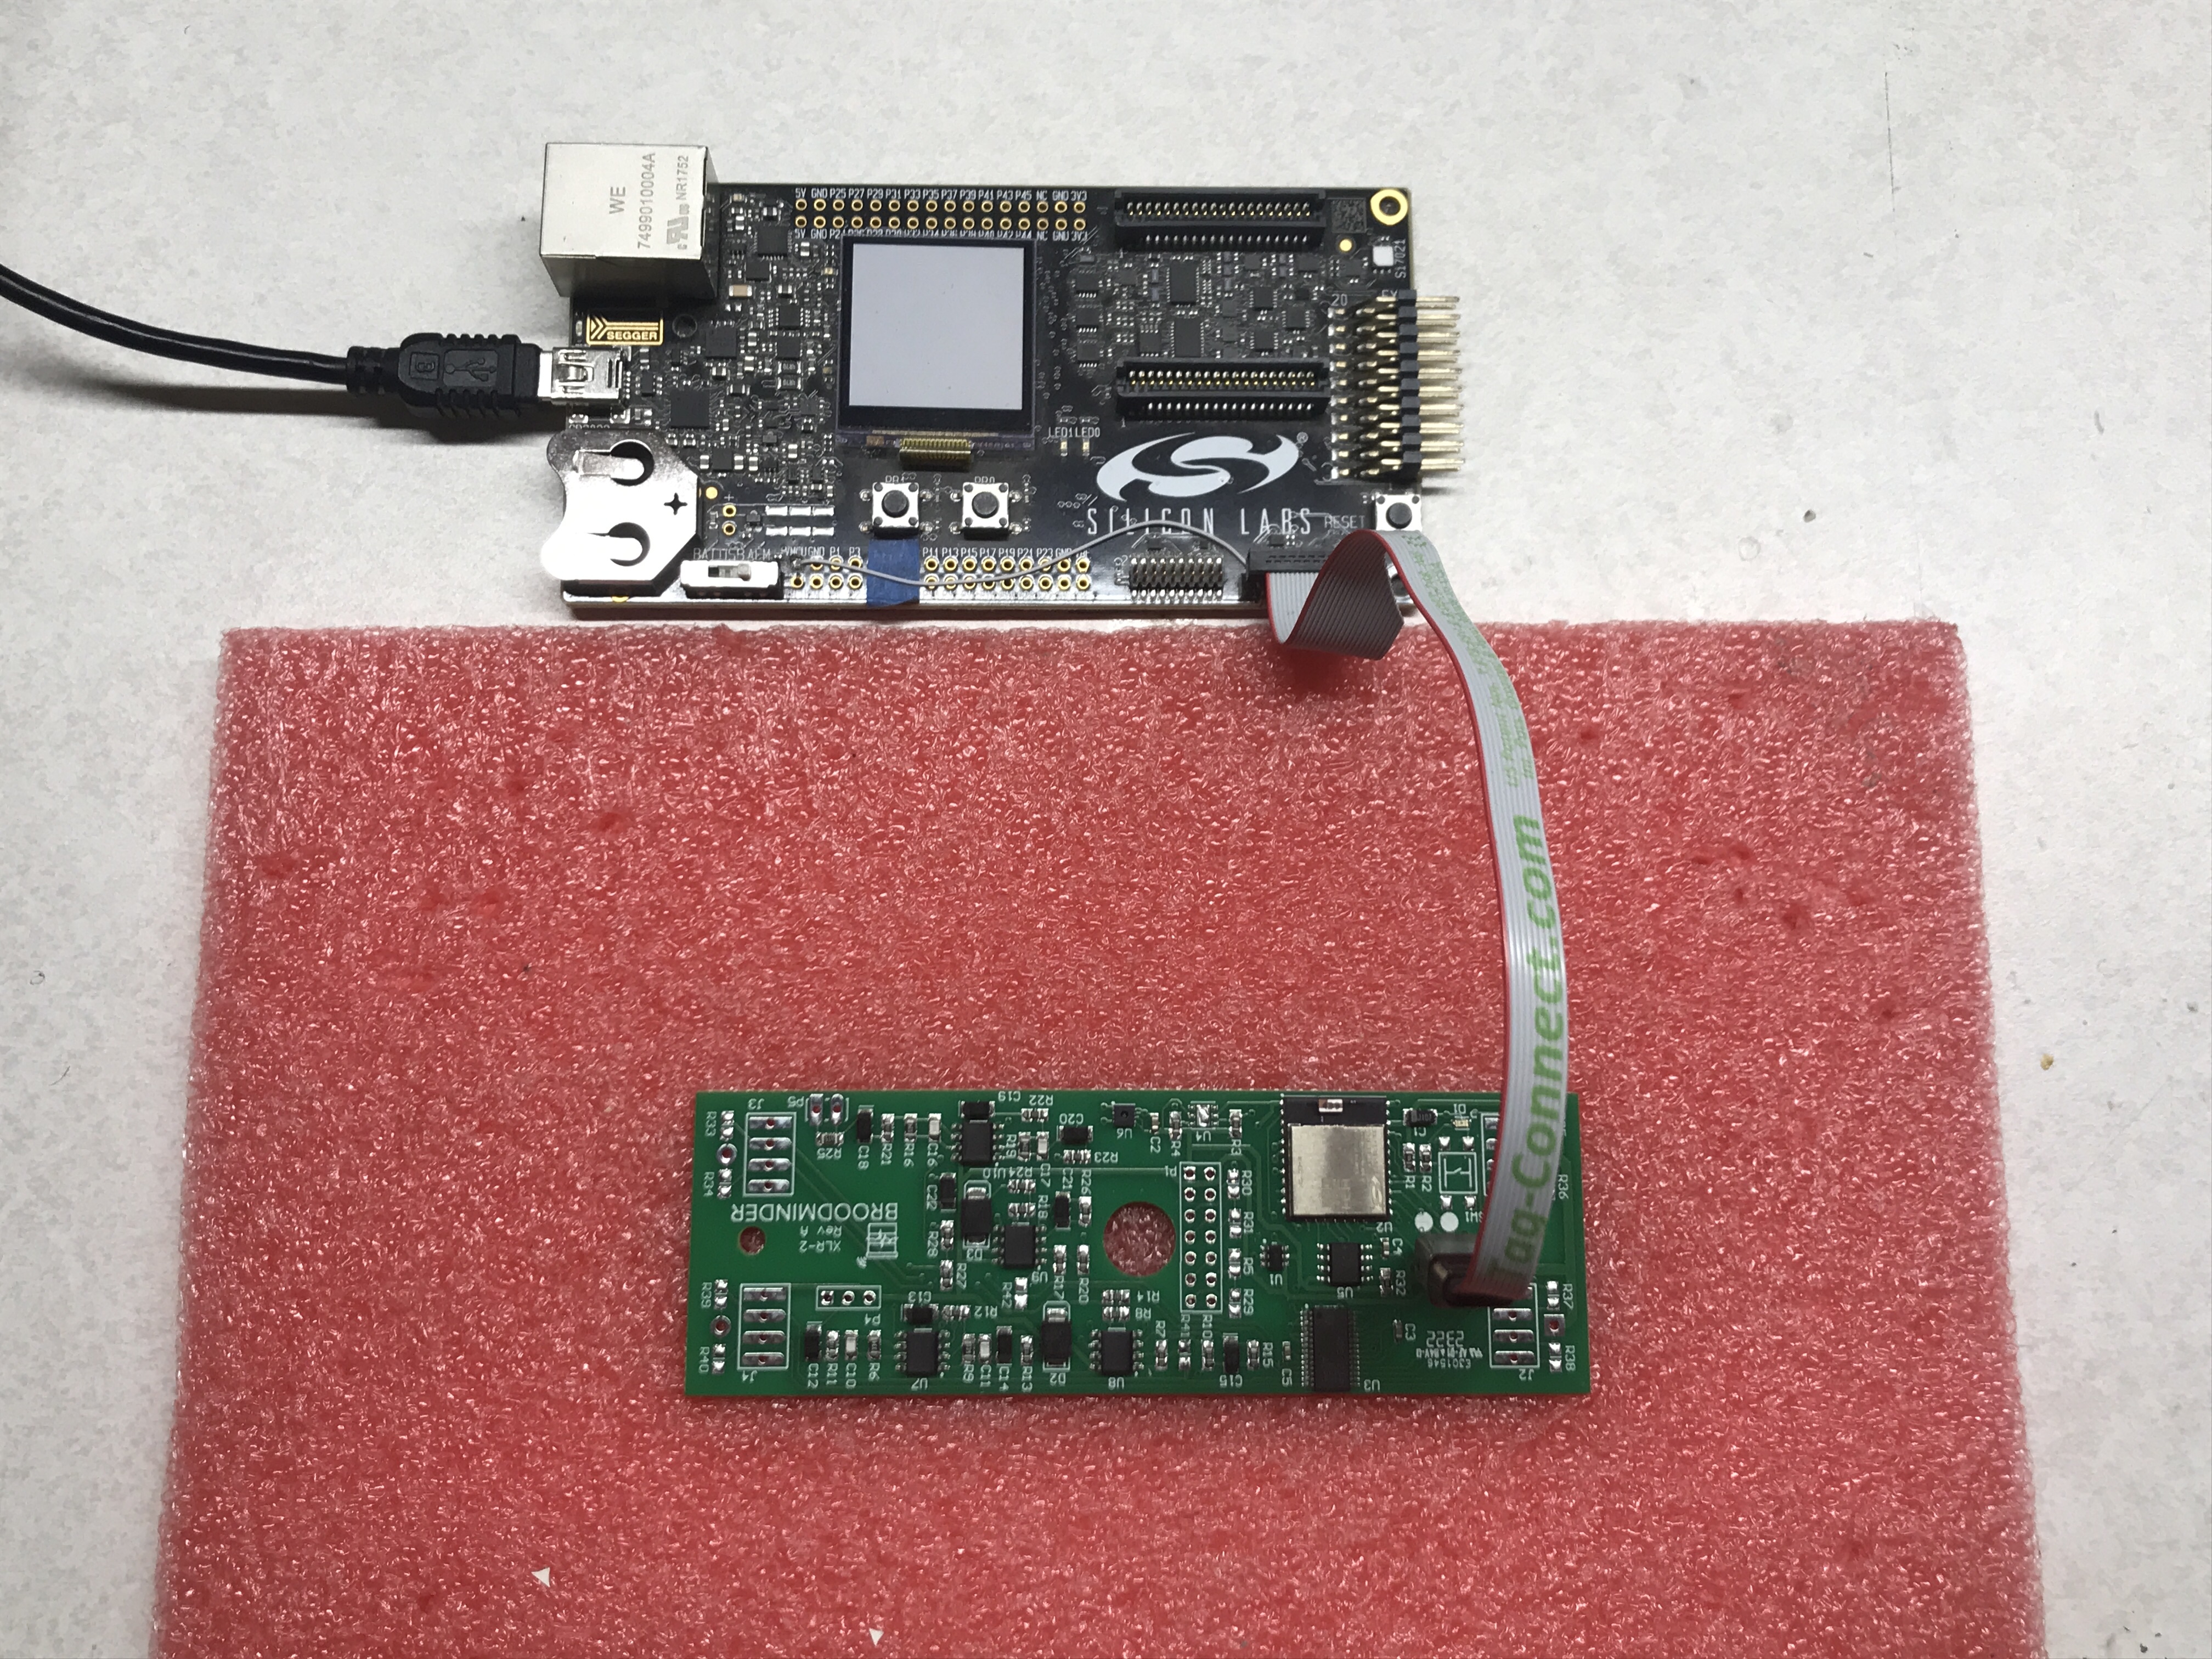
Use the pink foam to set the board.
Note
Programing is only done internally at BroodMinder HQ. If you acquired a DIY or a W3 kit, the programming is already done.
Prepare the board
- tin all 16 pads on a flat surface
- solder the battery holder on the BAT2 slot (+ goes with the square pad)
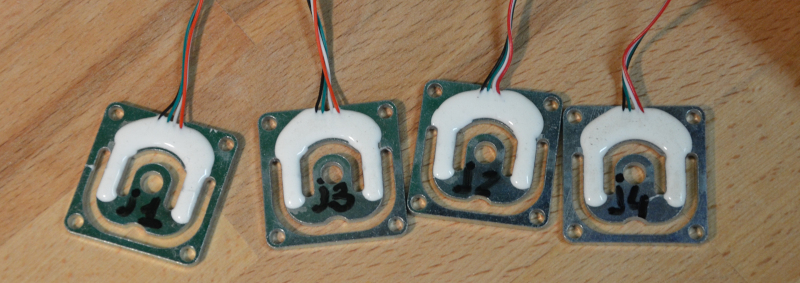
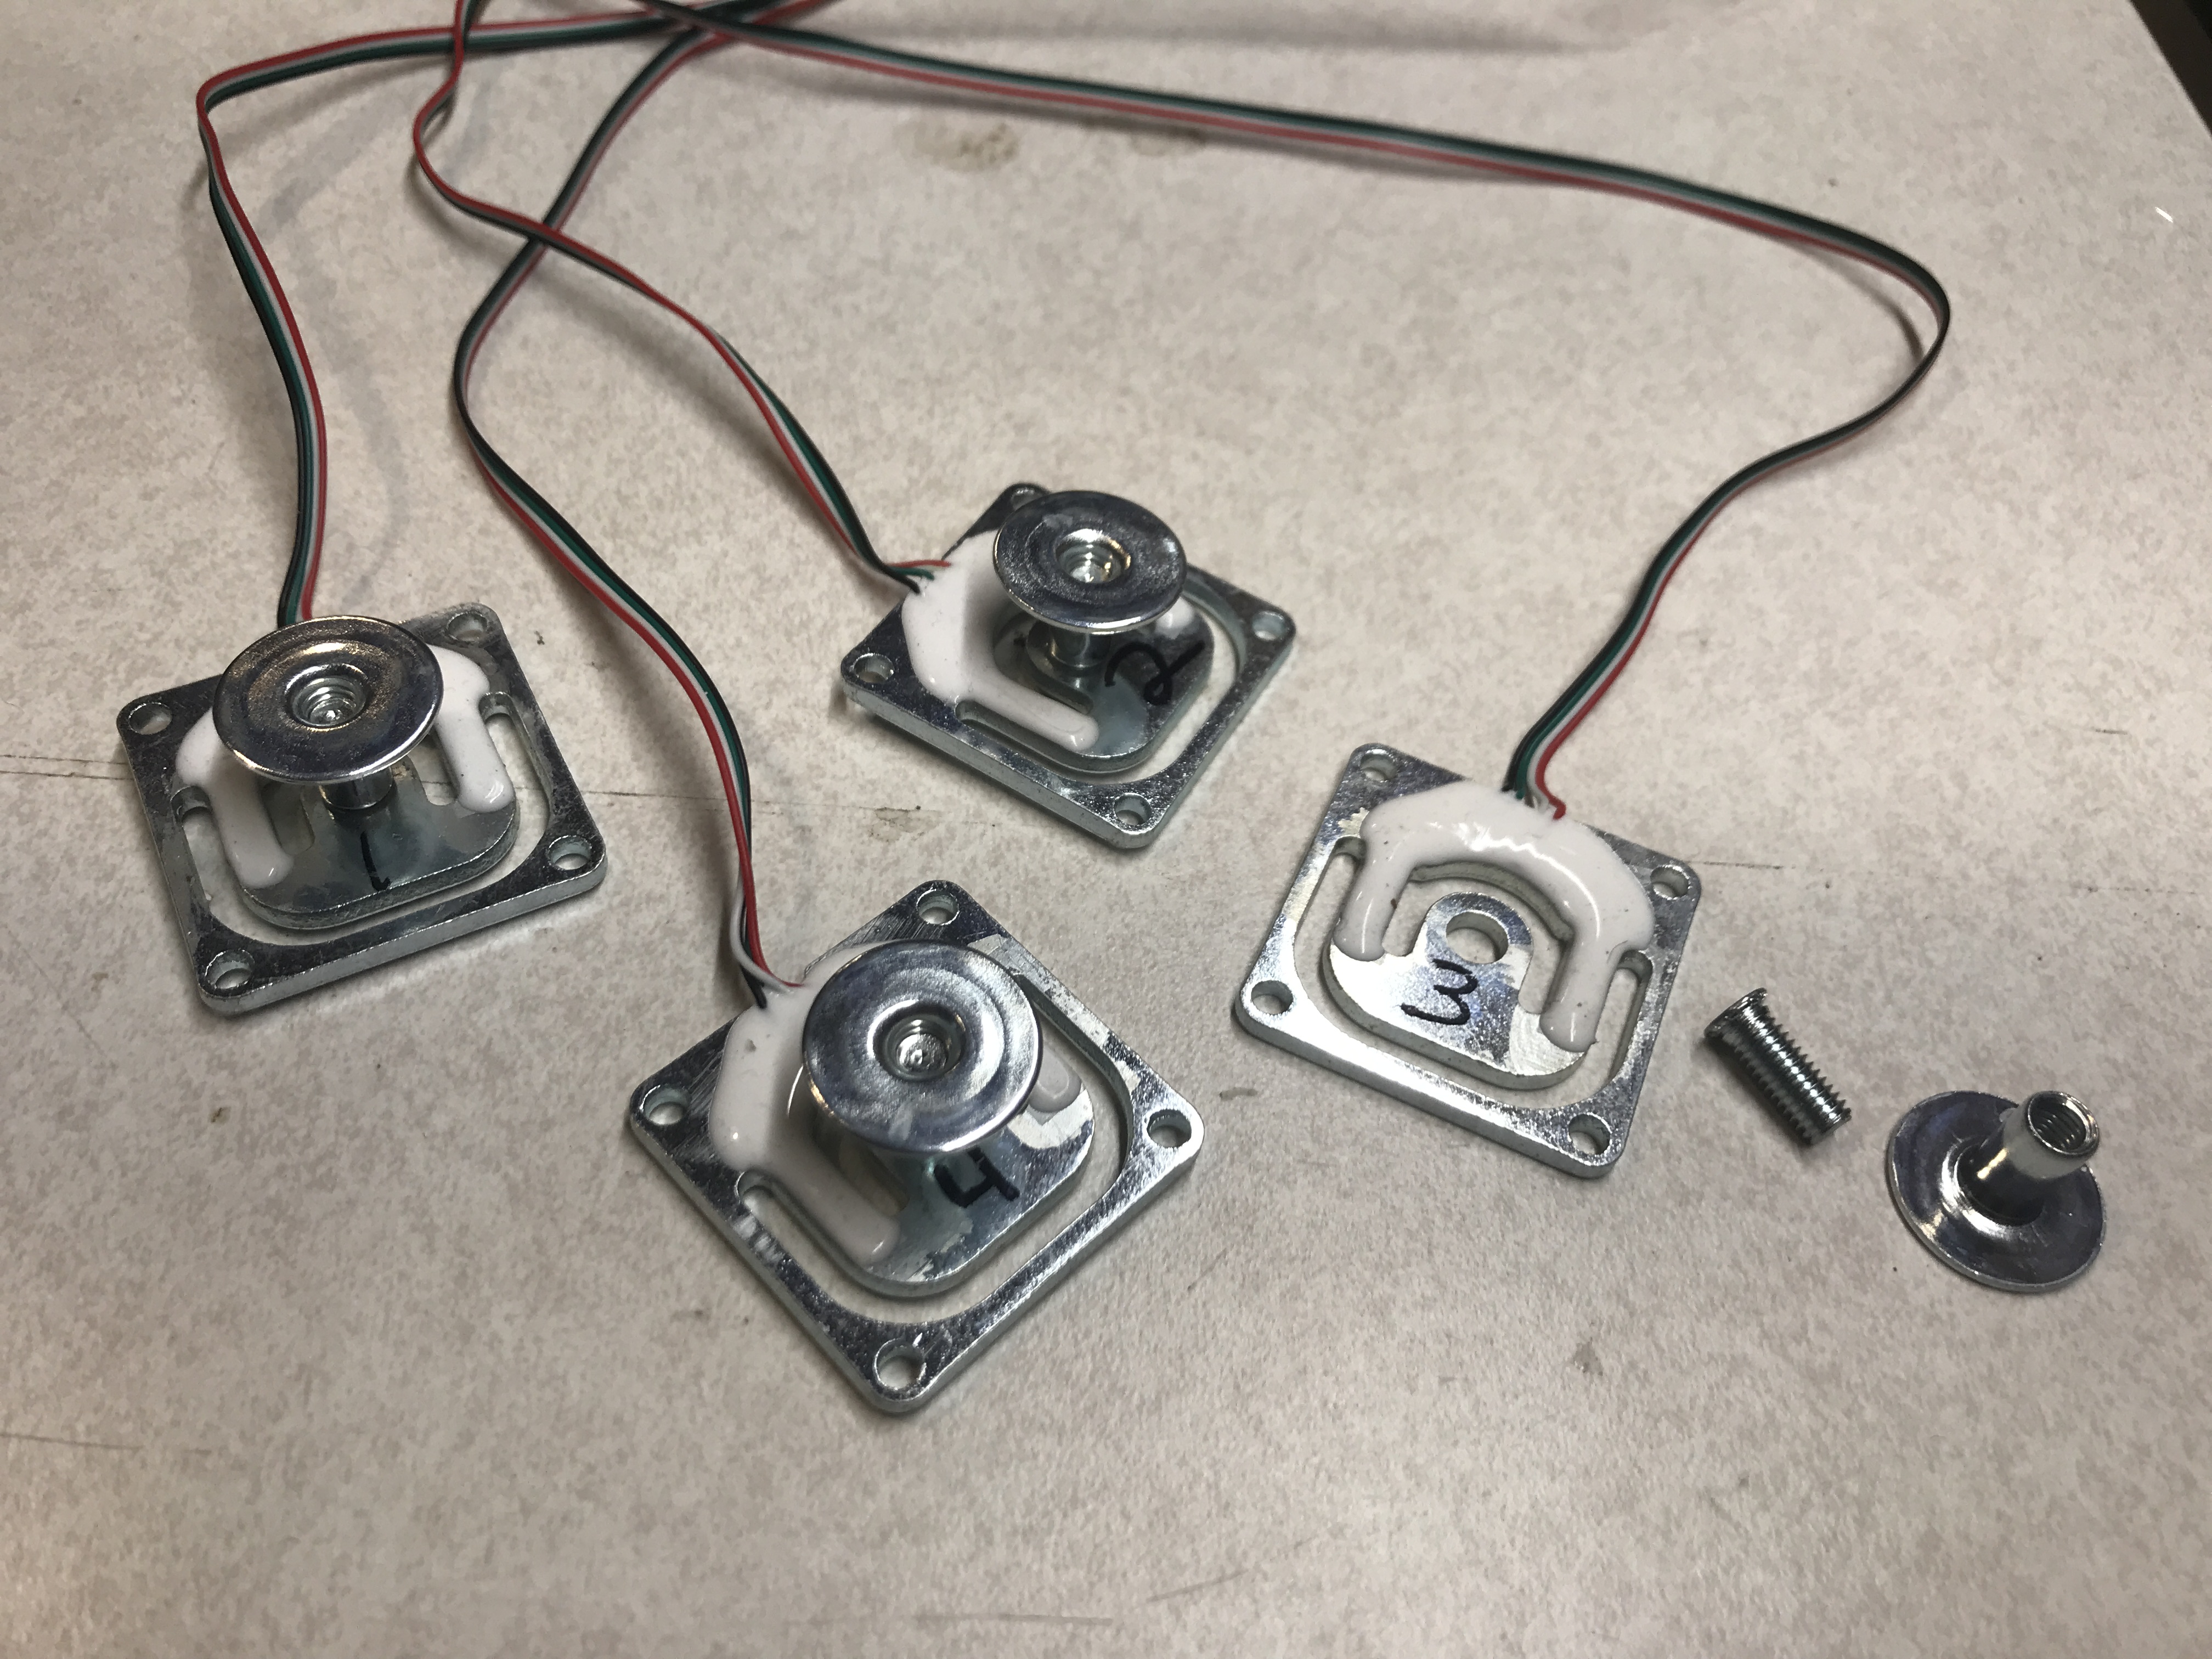
Prepare the load cells
Now with a permanent marker note the load cell position : J1, J2, J3, J4.
Remember :
| Left | Right | |
|---|---|---|
| Rear | J4 | J2 |
| Front | J3 | J1 |
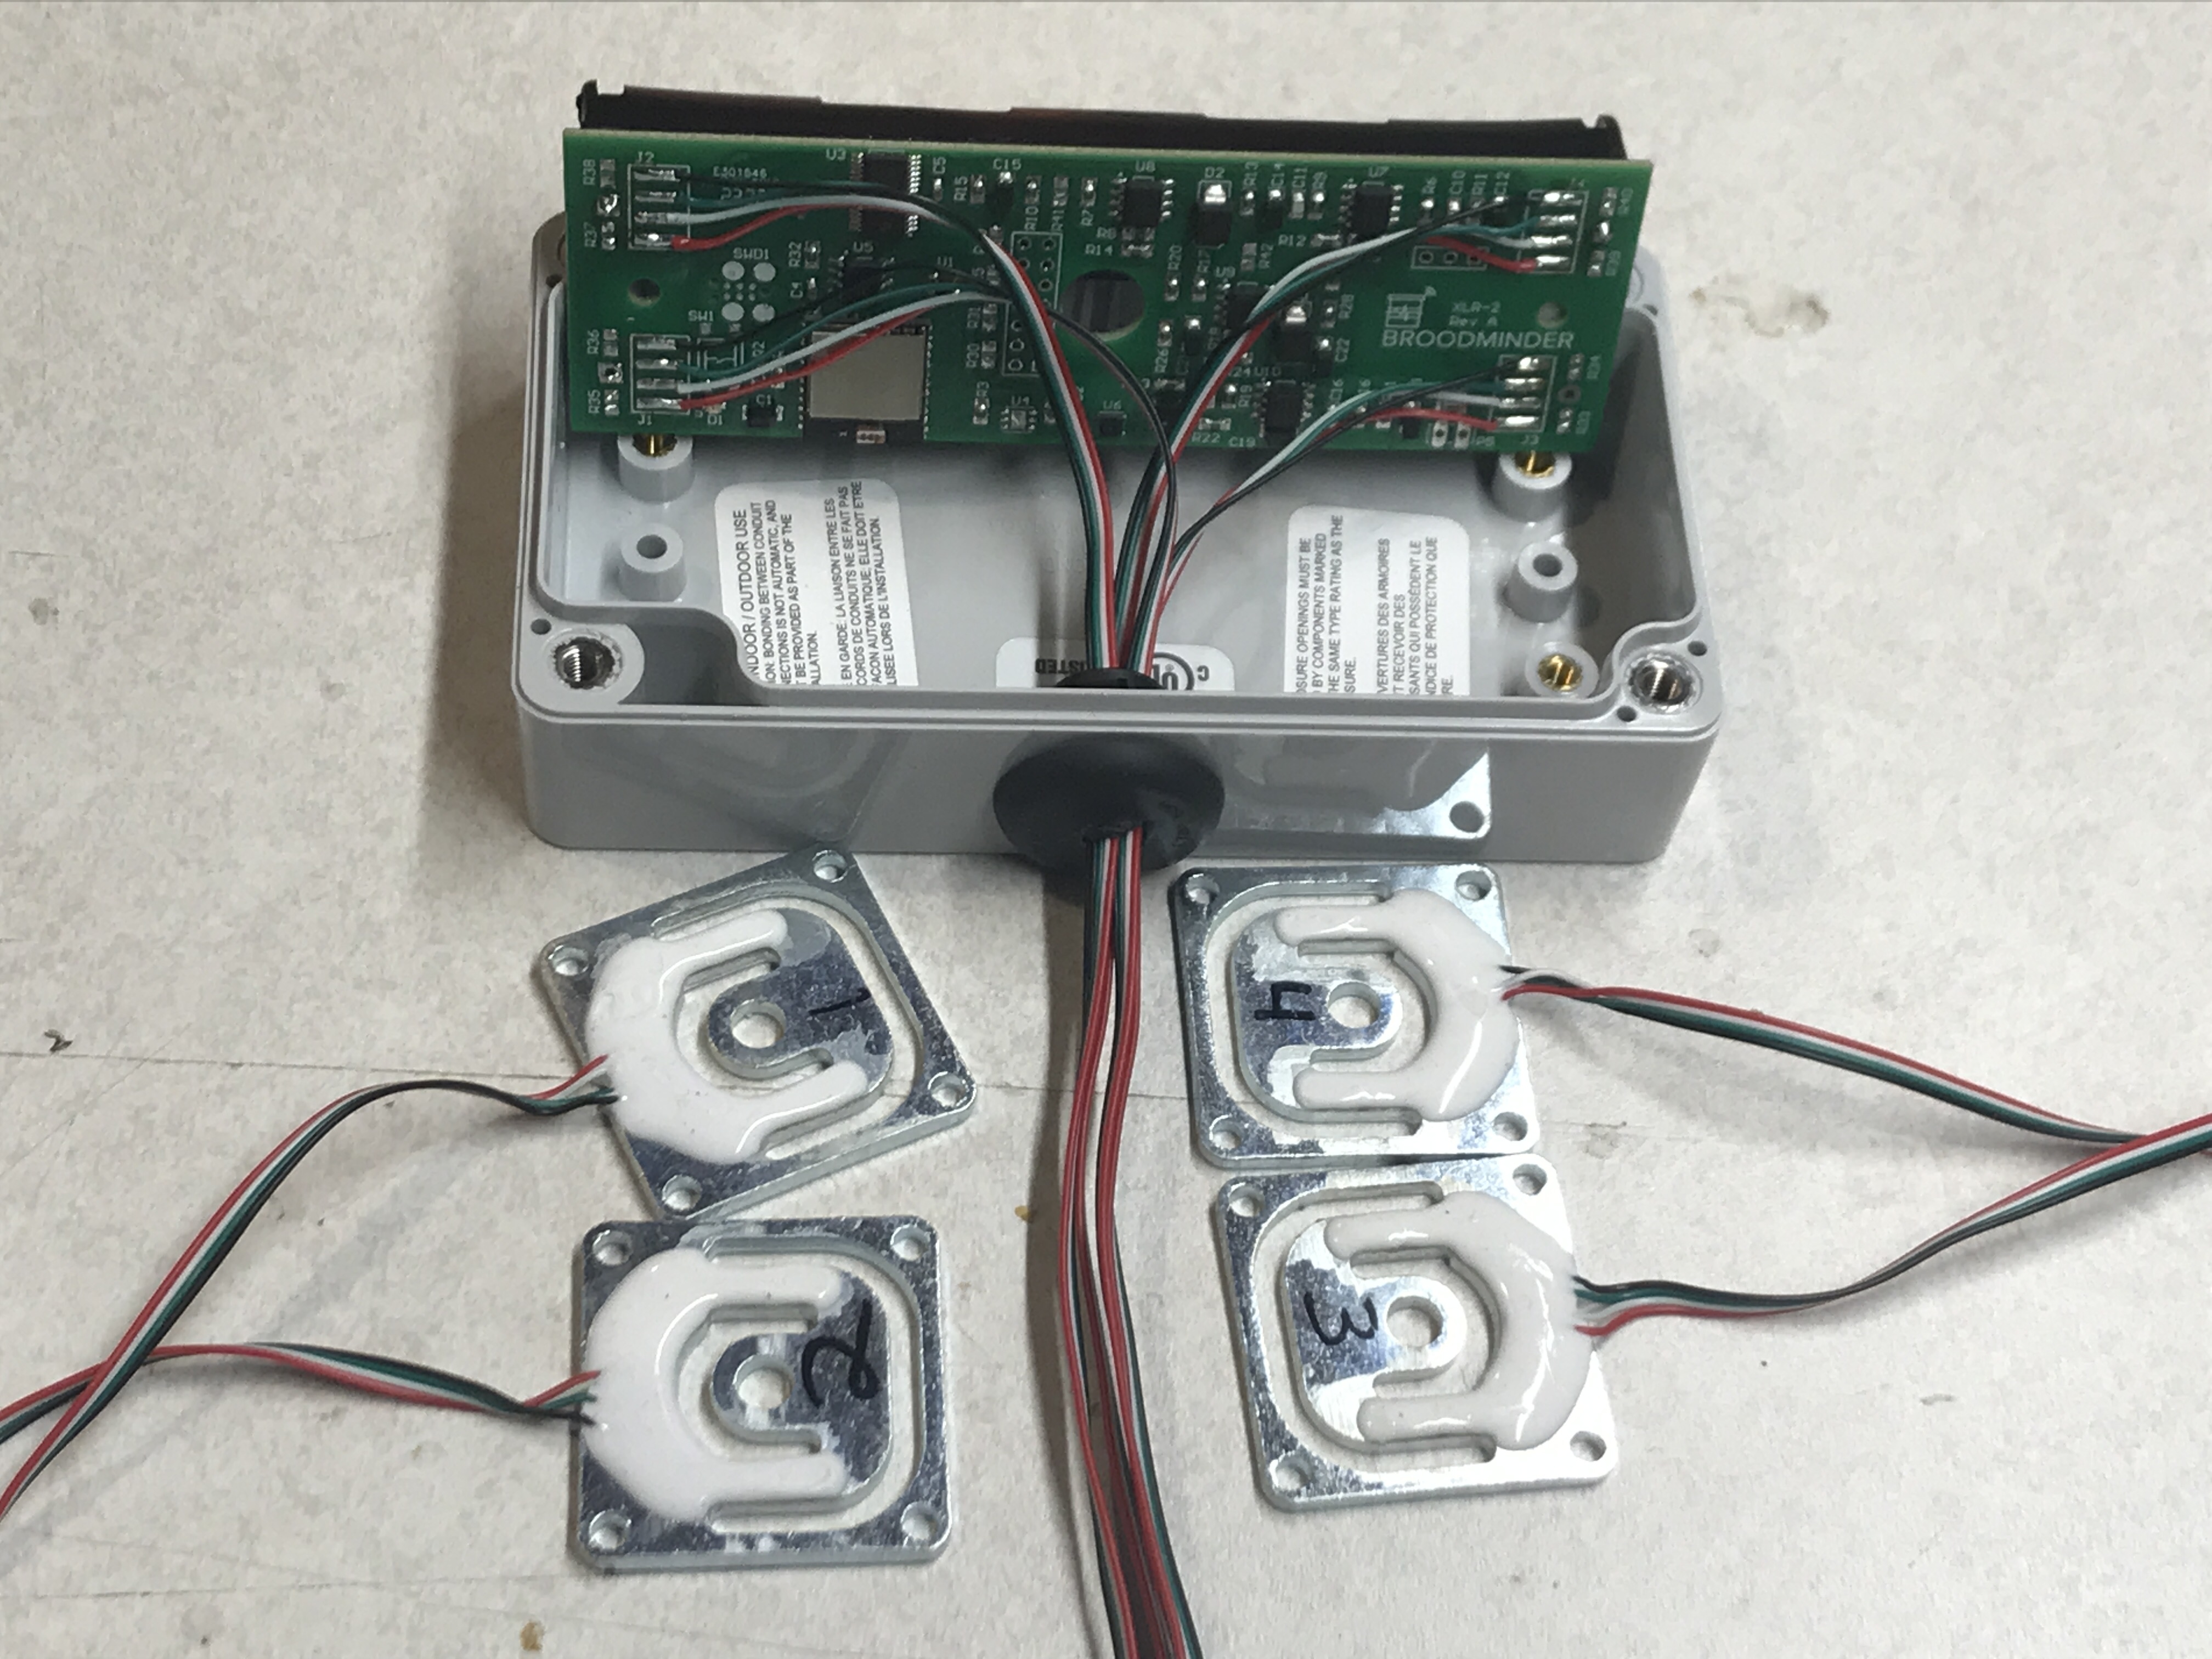
Now cut a slit on the rubber grummit. tape 4 wires together and pull them with a hemostat or pliers.
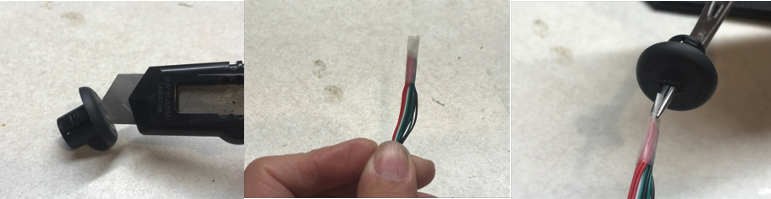
Drill a hole in the box with a 1/2in (12mm) bit. Route the wires through the hole and solder on the board pads following the color order Black-Green-White-Red as shown in the picture below
Note
Take care to associate each loadcell with its coresponding pad J[1-4]
Mount the scale feet
Mount the scale structure
Go to next chapter : W3 Scale Assembly